
The HTMLEdit application should be loaded by double-clicking on the !HTMLEdit icon in a RiscOS filer window.
The software will display a welcome banner, then install itself on the right hand side of the iconbar. The software is now ready for use.
Starting a New Document
There are two ways of creating documents with HTMLEdit:
We felt that there was a growing need for a way of rapidly producing simple pages from existing text and images without ever needing to edit a single line of HTML. This feature is particularly targeted at schools, and business users needing to create large numbers of simple pages quickly.
To start, simply click on the Quick Start button at the foot of the first DCA window. This opens a further window which allows you to pick one of the pre- defined layouts for your page. A brief description of the layout is shown in the box below the layout name, and a simple illustration shows you the result you will get.
Once you have selected a layout which suits your needs, click on the Next button, and you will be prompted to save your page to disc. The next window to be displayed is where you actually set up the attributes for your page. At the top of the window, you have access to the basic options for your page - title, colours, background graphics etc.
Below, you are prompted for up to two images (depending on the design), the location of the main text for the page (as a text file), a heading and sub- heading, and finally details for a by-line at the bottom of your page. Please note that for the images and text, you can simply drag files to the writable icons. For the images, all the usual conversion options are available if you drag a sprite file to the window.
After entering all the information, simply click on the OK button, and HTMLEdit will generate your web page, and load it into your Web Browser for viewing. The page will also open in the editor, so that you can make additional changes if you wish.
Depending on which method you used, you will now be faced with either a new document, or the Document Creation Assistant.
To load an existing document, drag the HTML page icon with the left mouse button held down, from a filer window onto the HTMLEdit icon on the iconbar. The document will now appear in an HTMLEdit window.
The Document Creation Assistant (DCA) provides a springboard into the creation of your HTML document. By selecting options from the screens that it presents, you can set up your page without needing to use any of HTMLEdit's other features and tools. The DCA starts with a window which allows you to choose what type of HTML document you wish to create:
Choosing to create an HTML 3 compatible page allows you to use the DCA to create coloured text and backgrounds, as well as pages with tiled background images.
The HTML 2 standard is fixed, and provides a base level to which all WWW browsers conform. By selecting an HTML 2 compliant page, the DCA will remove all its HTML 3 and Netscape extensions which may not be supported by your users' web browsers.
Finally, selecting a Blank Document allows you to get straight into HTMLEdit. You can click on the HTML Header button on the toolbar to get back to the DCA later.
We recommend you leave the Save page to disc option turned on, as it allows the Relative Path feature to work straight away. Turning it off means that the DCA won't prompt you to save your page, but you will be warned that Relative Paths won't be calculated until you save your work.
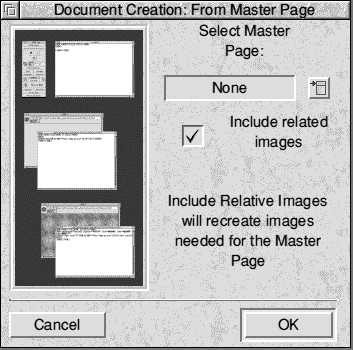
By left clicking on the menu icon to the right of the display box (currently saying 'None'), you can select which Master Page to use as the template for your document.
We recommend that you leave the Include Related Images option turned ticked,
unless you have a specific reason for not wanting HTMLEdit to recreate any images referenced in the Master Page.
The Title field should contain the name which you wish to give to your page. This will usually appear in the title bar of the WWW Browser when viewed, and in any Hotlist references to your page. There is nothing special about the title, but we recommend making it clear and succinct so that your viewers will know at a glance what it's about. Avoid using titles for special effects.
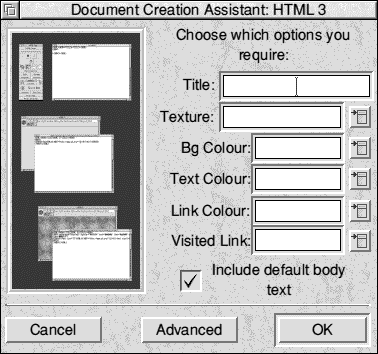
If you dragged a sprite file onto the window (rather than a JPEG or a GIF file etc.), the Image Conversion Assistant (ICA) will start up, giving you the opportunity to convert the sprite into one of several standard WWW image formats. The ICA is detailed later on in this manual. Once you've finished with the ICA, the relative path of the new image will appear in the Texture field.
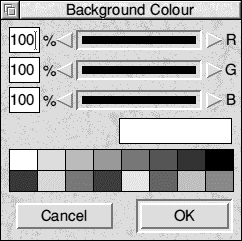
Clicking on the button to the right of a field opens a standard RiscOS colour picker window, allowing you to choose the colour. Once it has been selected, the DCA will calculate the appropriate hexadecimal colour reference for your choice. This is the standard way of expressing colours within HTML pages.
The format is #RRGGBB where R=Red, G=Green and B=Blue. Having two values for each component provides 256 possibilities for each, giving access to a full 16.7 million (24bpp) colour palette.
Finally, if the Include default body text button is ticked, HTMLEdit will add in the default text which can be set up via the Edit Default Text iconbar menu entry. This can be thought of as a global master page, which can be used even if you're not using the Master Page features.
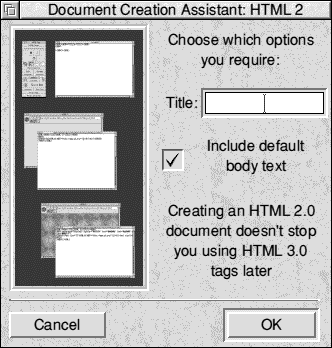
As before, the Title field should
contain the name of your page, as you wish it to appear in the title bar of the users' WWW browsers, and in hotlists.
The Include default body text button also performs exactly as described on the previous page.
The Advanced button brings up an extended version of the standard HTML 3 DCA window, allowing access to some of the more complex and professional extensions to a page’s setup.
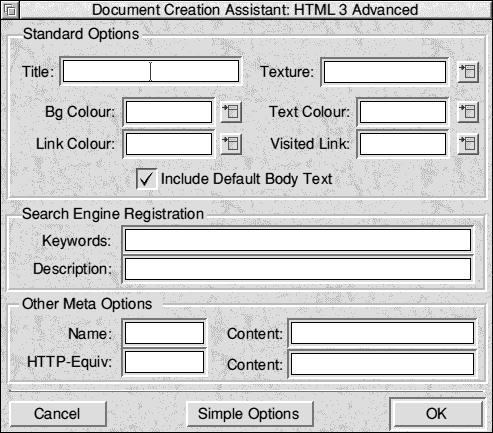
Below the Search Engine options, are two pairs of fields for what are known as ‘Meta Options’. In fact, the search engine fields are specific examples of Meta options, but are common enough to warrant special fields. You may wish to access specific web-server options or provide other information to browsers and servers in the form of meta options, and you can do that here. If you are unsure of what you are doing, we don’t recommend experimenting with meta options - they are in the Advanced section for a reason!
If you wish to revert to the standard DCA window, simply click on the Simple Options button at the bottom of the window.
On both the standard and advanced DCA windows, there is a new menu icon beside the Texture field, which is used to access the Image Database (new in v3) which is detailed fully later. Only the images in the ‘Textures’ category are displayed on this menu, making it easy to group all your tilable background images together and access them quickly. Simply click on the background you wish to use, then drag the resulting save icon to the location you wish to place the image in your WWW site. You will see that the correct details are filled in in the Texture field.
Once you have finished filling in the details into the DCA, HTMLEdit will generate a page using the information you have entered.
 At this point, the page contains little, if
any, actual content, but the document
will have been configured and set up
according to all the proper HTML
conventions.
At this point, the page contains little, if
any, actual content, but the document
will have been configured and set up
according to all the proper HTML
conventions.
In the main editing window, you will see these codes near the top of the page. If you are not familiar with HTML, don't worry, you can ignore all this. Your main page should be entered in the blank space between the <BODY> and </BODY> tags, which should be clearly visible.
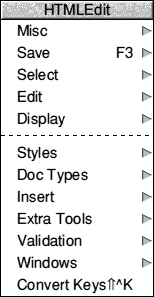
Remember that HTMLEdit's editing system is very similar to that of !Edit which came with your computer, and is documented in your computer's User Guide. All keyboard shortcuts remain the same in HTMLEdit, and the upper section of the HTMLEdit main menu is identical to that of !Edit. The upper half of the main menu corresponds exactly to !Edit and gives access to copying, formatting, saving and searching. The Windows submenu allows you to open directly the main toolbar, or to access all the main functions of the toolbar via a series of submenus, covering all document types, a hexadecimal colour reference at the palette, a range of extra tools for converting or converting linefeed characters [Od]s; access to the checking tools and all the windows, plus a conversion assistant for foreign language versions of chars ( see foreign characters set later).
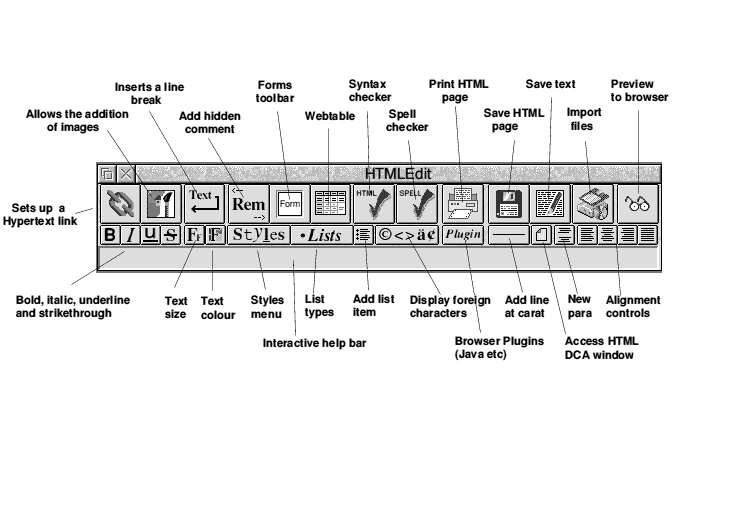
Secondly, dragging any file to the Image button will display that file inline as an illustration. The advantage of this is that should further WWW filetypes be introduced in the future (even without RiscOS filetypes etc.) HTMLEdit will be able to handle them without any fuss.
In addition, HTMLEdit Studio allows you to drag files to the main editing window, to perform much the same process. However, dragging an HTML file to the main window will insert it at the caret, rather than creating a link. This must still be done via the toolbar. One final, useful, importing addition is that if you hold down the Shift key when dragging any file to the main window HTMLEdit will insert a relative path filename for the file at the caret. This is very useful if you wish to change the location of a link or image, as you can simply erase the filename, and shift- drag in the new file.
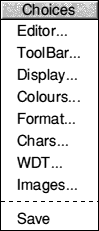
You can control the behaviour of the toolbar via the Toolbar options on the Choices menu. This can be found off the HTMLEdit iconbar menu.
In contrast to previous versions of HTMLEdit which provided slightly extended help when right-clicking on toolbar buttons, HTMLEdit uses this method to access tags which are extended, advanced or very similar versions of the primary function. This has allowed us to support more HTML 4 tags, without cluttering the toolbar up with many more options. The interactive help bar will detail both left and right click versions.